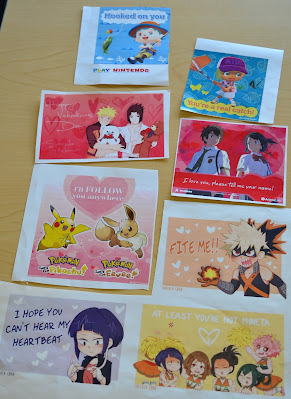
Hi Teens, Nikki here with another DIY Craft blog post! This time I am keeping our yearly Anime Valentine’s day cards tradition alive! If you are new to the library or the blog, we typically (pre-covid) make these during Teen Anime Club the Saturday before Valentine’s Day and it was always popular! I want say a Happy Valentine’s Day to all of my teens that used come to Anime club and to our new teens that have been coming into library to get books! Remember we are still open to come in and check out books. At the end of this post, we will tell you some of our favorite romance manga that you can check out to read! Now let’s get started!
Here is list of materials you will need:
* Printable anime Valentine’s Day cards (or any fandom ones if you are not into anime). If you do not have printer at home, you can come into the teen room to print them out. It is .25 cents per page for color prints, and you will need to have your own library card to access a teen computer. If you do not library card, it is free to get one! Just have parent come in with you because they will need to sign for you. They will also need valid ID that has your current address or a piece paper that shows your current street address with their ID.
* Cardstock in colors red, white, & pink or any colors you want.
* Valentine’s day theme washi tape (can be found online or local craft stores)
* Valentine’s day stickers & foam hearts to decorate (again can be found at local craft stores or online)
* Scissors, decorative craft scissor (optional) & Glue stick
* Gel pens
Step 1: Copy and print out the cards
Search for printable anime Valentine’s Day cards or your other favorite fandoms like Animal Crossing. Copy and paste the pictures into a Word or Publisher document and adjust the size to your liking, print them and cut them out.
Gather your cardstock colors you want to use as a background. Take your glue stick and glue the photos onto the cardstock in the corner while leaving some room to decorate. I used some craft scissors that have different edges to make the cardstock have some flair. Then, take your washi tape and place some around the edges to make border. You can also put the tape first before you glue your photo to make it look like border also. If you notice your washi tape isn’t sticky enough, you can use a little bit of mod podge to help adhere it or use the glue stick on the washi. Then use your stickers or foam hearts to finish decorating. You can even decorate the back of the card too.
Step 3: Personalize it to someone special
Whether it is giving the card to a friend, your boyfriend or girlfriend, your secret crush or a family member, it is nice to personalize a message on the back of the card. You can even just do the normal To: and From: if you like. I like to use gel pens when writing it out the message but you can use markers too.
Step 4: Give it to that special someone
When you are satisfied with how your valentines card is made, give it to that person in a safe way (don’t forget your face mask). If you are doing virtual schooling and can’t see your friend, see if you can mail your card to your friend. Who doesn’t like getting happy mail?! You can even find a template online on to make to an envelope if you do not have one. Doing small gestures like making Valentine’s Day card is a nice way to let someone know you are thinking about them and makes their day.
Below are some recommendations for romance manga, if you feel like reading something romantic!


No comments:
Post a Comment